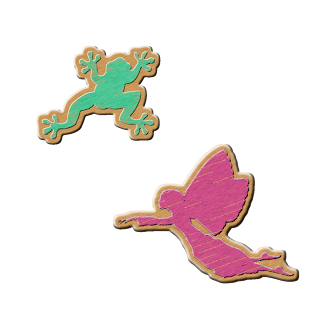
You can make these cute wooden shapes for your page. Make an alphabet, wordart, a frame, or whatever you want!

This tutorial will be in paint.net but you can use photoshop and get the same effect.
Here is a frog and a fairy for you that I made so you can see what the final project will look like. To use these two wood blocks just click the image, right click and save as a .png file!
Prepare:
- open an object in paint.net. It should be a solid colored object.
- duplicate the layer so you have two layers with the same object.
- make sure you have downloaded and installed the bevel, jitter, motion blur, and outline plug-ins from the paint.net forum.
3. outline the object with a neutral brown color for wood or a silver color for brushed metal. You can outline the same shape or do a circle or square around the object. This will be your wooden base.
4. Add noise to the wooden base
5. Select the image and add motion blur at an angle. You want to specifically select the wooden base so when you apply the motion blur the base will stay the same shape.
6. Bevel the bottom layer using the bevel plug-in
On the top layer: (paint)
7. add noise to the object then add motion blur like you did above.
8. To get the faded or scratched paint effect use the jitter plug-in (menu: effects, distort, jitter). Play with it until you are happy with the look.
9. bevel the top layer
I hope this was helpful.
THANKS!


1 comment:
Hello,
I have you as a follower on my blog. I thank you for that, I added my self to yours now. I have snagged on of your layouts to use. I will post it on my blog to see and on the digiscrapdepot site also.
Thank you for sharing your work.
Have a great day!
Post a Comment