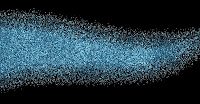
 Ever wonder how people make those lovely glitter images for their pages? I did so I investigated and made the following tutorial for you. I use paint.net so the tutorial is done in that program. The program is free and you can download all the plug-ins you need to make this program work like magic! Even if you do not use paint.net, most of the other photo editing spftware have simillar commands, just located in different places.
Make sure you have the tools:
1. download the following plug-ins: "frosted glass", "crystalize", and "sharpening"
2. Get a sheet of glittery paper. You con download any number of glitter squares if you search on google or digiscrapdepot.com
Tutorial:
1. Open your glitter sheet in paint.net
(If you don't have a glitter sheet then open up the image and "add noise" colored or black and white, this will give you the variation of light and dark that will be the reflective glitters)
2. select the shape you want the glitter embellishment to be (butterfly or flower or nike swoosh...just do it!)
3. Now you have your shape cut out of the glitter sheet
4. On the effects menu under distort, select frosted glass. Tweak the settings until you have a spray of color you like.
5. On the effects menu under distort select crystalize. You want to keep the settings low on this. Crystalize at a 1 or 2.
6. on the effects menu under photo select sharpening. Tweak this until you are happy with the colors.
7. Adjust the brightness and contrast or play with luminosity curves, if your more advanced, to get it just the way you want it!
(Other program note: you can achieve frosted glass effect by blurring the image and "add noise". Make sure color saturation is at zero. You can have the noise to be black and white or color. Then, move onto the crystalize step. Or, you can customize your glitter by using brushes. There are all sorts of glitter brushes for photoshop that are out there and free!)
Once you master this, you can make borders and edge things in glitter. Play with it! I hope this was helpful!
WOW! Glitter-riffic!
Here are the before and after pictures!


1 comment:
Thanks for the great tutorial!! Clear and easy to follow...great work!
Post a Comment